Category Archives: UEFI Secure Boot

Posts related to UEFI Secure Boot

efitools for arm released

Thanks to using architecture emulation containers, I can now build and test efitools for arm (both 64 bit: aarch64 and 32 bit armv7l) on my x86_64 laptop.  To test the actual EFI binaries, you need the arm equivalent of OVMF which is ArmVirt.  I’ve got the build service spitting out the images (still called OVMF because of package naming requirements) for those who want to try this at home.  To run the UEFI image, you need qemu-system-<arch> which, on SUSE, is provided by the qemu-arm package.  The Linaro ARM64 site has detailed instructions, but for the impatient, the required command line (for aarch64) is

qemu-system-aarch64 \
        -m 2048 \
        -cpu cortex-a57 \
        -M virt \
        -bios /home/jejb/ovmf-aarch64.bin \
        -serial stdio \
        -drive if=none,file=fat:.,id=hd0 \
        -device virtio-blk-device,drive=hd0

Which brings up the UEFI bios image and mounts the current directory as an additional fat volume.  The Linaro site recommends 1024 for the memory size, but if you want to boot a kernel or do anything fancy, you’ll find 2048 is the minimum.  The same thing will work for 32 bit arm (except that you want to remove the -cpu line).

To get efitools to build, I had to get the arm versions of sbsigntools up and running, which I have.  The source tree I used for this is here.  There were a few modifications necessary to build arm, but nothing drastic.  Since the Ubuntu version of the git tree appears to be dead, I’ve merged back all the ubuntu patches and will maintain this going forwards.  I’ll bump the release version to 0.8 when I’m sure everything is stable.

Status

Using this, the current status is that the aarch64 binaries are all running fine and have verified nicely.  Unfortunately, there’s still some problem with generating efi binaries for the 32 bit arm systems.  Most of the simple binaries are running OK, but the more complex ones (like KeyTool) are showing symptoms of data relocation problems which I’m still investigating.  I’ll push a new release of efitools when I can get this sorted out, although it looks like a more generic problem inside gnu-efi itself.  Edk2 builds of am32 efi binaries seem to be working, so I’ll see if I can deduce what’s missing from gnu-efi.

Secure Boot on the Intel Galileo

The first thing to do is set up a build environment.  The Board support package that Intel supplies comes with a vast set of instructions and a three stage build process that uses the standard edk2 build to create firmware volumes, rips them apart again then re-lays them out using spi-flashtools to include the Arduino payload (grub, the linux kernel, initrd and grub configuration file), adds signed headers before creating a firmware flash file with no platform data and then as a final stage adds the platform data.  This is amazingly painful once you’ve done it a few times, so I wrote my own build script with just the essentials for building a debug firmware for my board (it also turns out there’s a lot of irrelevant stuff in quarkbuild.sh which I dumped).  I’m also a git person, not really an svn one, so I redid the Quark_EDKII tree as a git tree with full edk2 and FatPkg as git submodules and a single build script (build.sh) which pulls in all the necessary components and delivers a flashable firmware file.  I’ve linked the submodules to the standard tianocore github ones.  However, please note that the edk2 git pack is pretty huge and it’s in the nature of submodules to be volatile (you end up blowing them away and re-pulling the entire repo with git submodule update a lot, especially because the build script ends up patching the submodules) so you’ll want to clone your own edk2 tree and then add the submodule as a reference.  To do this, execute

git submodule init
git submodule update --reference <wherever you put your local edk2 tree> .module/edk2

before running build.sh; it will save a lot of re-cloning of the edk2 tree. You can also do this for FatPkg, but it’s tiny by comparison and not updated by the build scripts.

A note on the tree format: the Intel supplied Quark_EDKII is a bit of a mess: one of the requirements for the edk2 build system is that some files have to have dos line endings and some have to have unix.  Someone edited the Quark_EDKII less than carefully and the result is a lot of files where emacs shows splatterings of ^M, which annoys me incredibly so I’ve sanitised the files to be all dos or all unix line endings before importing.

A final note on the payload:  for the purposes of UEFI testing, it doesn’t matter and it’s another set of code to download if you want the Arduino payload, so the layout in my build just adds the EFI Shell as the payload for easy building.  The Arduino sections are commented out in the layout file, so you can build your own Arduino payload if you want (as long as you have the necessary binaries).  Also, I’m building for Galileo Kips Bay D … if you have a gen 2, you need to fix the platform-data.ini file.

An Aside about vga over serial consoles

If, like me, you’re interested in the secure boot aspect, you’re going to be spending a lot of time interacting with the VGA console over the serial line and you want it to look the part.  The default VGA PC console is very much stuck in an 80s timewarp.  As a result, the world has moved on and it hasn’t leading to console menus that look like this

vgaThis image is directly from the Intel build docs and actually, this is Windows, which is also behind the times1; if you fire this up from an xterm, the menu looks even worse.  To get VGA looking nice from an xterm, first you need to use a vga font (these have the line drawing characters in the upper 128 bytes), then you need to turn off UTF-8 (otherwise some of the upper 128 character get seen as UTF-8 encodings), turn off the C1 control characters and set a keyboard mapping that sends what UEFI is expecting as F7.  This is what I end up with

xterm -fn vga -geometry 80x25 +u8 -kt sco -k8 -xrm "*backarrowKeyIsErase: false"

And don’t expect the -fn vga to work out of the box on your distro either … vga fonts went out with the ark, so you’ll probably have to install it manually.  With all of this done, the result is

vga-xtermAnd all the function keys work.

Back to our regularly scheduled programming: Secure Boot

The Quark build environment comes with a SECURE_LD mode, which, at first sight, does look like secure boot.  However, what it builds is a cryptographic verification system for the firmware payloads (and disables the shell for good measure).  There is also an undocumented SECURE_BOOT build define instead; unfortunately this doesn’t even build (it craps out trying to add a firmware menu: the Quark is embedded and embedded don’t have firmware menus). Once this is fixed, the image will build but it won’t boot properly.  The first thing to discover is that ASSERT() fails silently on this platform.  Why? Well if you turn on noisy assert, which prints the file and line of the failure, you’ll find that the addition of all these strings make the firmware volumes too big to fit into their assigned spaces … Bummer.  However printing nothing is incredibly useless for debugging, so just add a simple print to let you know when ASSERT() failure is hit.  It turns out there are a bunch of wrong asserts, including one put in deliberately by intel to prevent secure boot from working because they haven’t tested it.  Once you get rid of these,  it boots and mostly works.

Mostly because there’s one problem: authenticating by enrolled binary hashes mostly fails.  Why is this?  Well, it turns out to be a weakness in the Authenticode spec which UEFI secure boot relies on.  The spec is unclear on padding and alignment requirements (among a lot of other things; after all, why write a clear spec when there’s only going to be one implementation … ?).  In the old days, when we used crcs, padding didn’t really matter because additional zeros didn’t affect the checksum but in these days of cryptographic hashes, it does matter.  The problem is that the signature block appended to the EFI binary has an eight byte alignment.  If you add zeros at the end to achieve this, those zeros become part of the hash.  That means you have to hash IA32 binaries as if those padded zeros existed otherwise the hash is different for signed and unsigned binaries. X86-64 binaries seem to be mostly aligned, so this isn’t noticeable for them.  This problem is currently inherent in edk2, so it needs patching manually in the edk2 tree to get this working.

With this commit, the Quark build system finally builds a working secure boot image.  All you need to do is download the ia32 efitools (version 1.5.2 or newer — turns out I also didn’t compute hashes correctly) to an sd card and you’re ready to play.

efitools now working for both x86 and x86_64

Some people noticed a while ago that version 1.5.1 was building for ia32, but 1.5.2 is the release that’s tested and works (1.5.1 had problems with the hash computations).  The primary reason for this work is bringing up secure boot on the Intel Quark SoC board (I’ve got the Galileo Kipps Bay D but the link is to the new Gen 2 board).  There’s a corresponding release of OVMF, with a fix for a DxeImageVerification problem that meant IA32 hashes weren’t getting computed properly.   I’ll post more on the Galileo and what I’ve been doing with it in a different post (tagged for embedded, since it’s mostly a story of embedded board programming).

With these tools, you can now test out IA32 images for both UEFI and the key manipulation and signing tools.

UEFI Secure Boot Tools Updated for 2.4

UEFI 2.4 has been out for a while (18 months to be exact).  However, it’s taken me a while to redo the tianocore builds for the 2.4 base.  This is now done, so the OVMF packages are now building 2.4 roms

https://build.opensuse.org/package/show/home:jejb1:UEFI/OVMF

Please remember that this is bleeding edge.  I found a few bugs while testing the tools, so there are likely many more lurking in there.  I’ve also updated the tools package

https://build.opensuse.org/package/show/home:jejb1:UEFI/efitools

As of version 1.5.1, there’s a new generator for hashed revocation certificates and KeyTool now supports the timestamp signature database.  I’ve also published a version of sbsigntools

https://build.opensuse.org/package/show/home:jejb1:UEFI/sbsigntools

Which, as of 0.7, has support for multiple signatures.

Problems with TianoCore after multi-sign (r14141) Fixed

For technical reasons, all of my tools broke with all versions of TianoCore after r14141 (Update the DxeImageVerificationLib to support for Authenticode-signed UEFI images with multiple signatures.)  What actually happened is that the multi signature verification code got stricter on the alignment requirements for signatures.  The current sbsigntools (and even pesign) simply slapped the signature block immediately at the end of the binary.  Unfortunately this meant that most of the time it wasn’t actually aligned on a long word boundary meaning that most signatures with old versions of sbsign and pesign start giving security violations on new TianoCore platforms.  I’ve fixed sbsigntools to pad the end of the binary and ensure that the signature block always starts on a long word alignment and verified that the signatures now work again with the latest versions of TianoCore.

I’ve updated the OVMF, efitools and sbsigntools packages with fixes for this problem and they should now be propagating through the system.

efitools 1.4 with linux key manipulation utilities released

This is a short post to announce the release of efitools version 1.4. The packages are available here:

http://download.opensuse.org/repositories/home:/jejb1:/UEFI/

Just select your distribution (various versions of Debian, Ubuntu, Fedora and openSUSE).

The main additions over version 1.3 is that there are two new utilities: efi-readvar and efi-updatevar that allow you to read and manipulate the UEFI signatures database from linux userspace.  The disadvantage of these tools is that they require the new efivarfs filesystem to be mounted somewhere in the system (efivarfs was added in kernel 3.8, so you either have to be running a very recent distribution, like openSUSE Tumbleweed, or you have to build your own kernels to use it).    To mount the efivarfs filesystem, just do

modprobe efivars

mount -o efivarfs none /mnt (or some other useful mount point)

As long as this is successful, you can now use the efi- tools to read and write the secure variables.  In order to write the variables in User Mode, you must have the private part of the Platform and Key Exchange Keys available.  So, assuming your private part of the platform key is PK.key, you can add your own KEK with

efi-updatevar -a -c KEK.crt -k PK.key KEK

And then add your own signature database key with

efi-updatevar -a -c DB.crt -k KEK.key db

Where KEK.crt and DB.crt are X509 certificates.

Note that by default, files in the efivarfs filesystem are owned by root and have permission 0644, so efi-readvar can be executed by any user, but efi-updatevar needs to be able to write to the variable files (i.e. would have to run as root).

There’s also extensive man pages documenting all the options for both efi-readvar and efi-updatevar.

Debian and Ubuntu packages for sbsigntools and efitools built

I got a lot of complaints about the lack of Debian or Ubuntu packages.  Apparently alien doesn’t work all that well, and some of the packages (like libc) are too new anyway on openSUSE.  So I finally figured out how to get OBS to build debian packages.  You can find them here:

http://download.opensuse.org/repositories/home:/jejb1:/UEFI/

I should note that don’t have an Ubuntu system, so the Ubuntu debs are untested.  The Debian packages work on my wheezy and testing systems.  In spite of the directory name, I severely doubt they’ll work properly on Debian 6.0: the openssl on that platform is too old, so I had to construct a special one just to get it to build.

If you want to keep them up to date, add this line to /etc/apt/sources

deb http://download.opensuse.org/repositories/home:/jejb1:/UEFI/Debian_6.0/ ./

And also add the repository key with apt-key add

Owning your Windows 8 UEFI Platform

Even if you only ever plan to run Windows or stock distributions of Linux that already have secure boot support, I’d encourage everybody who has a new UEFI secure boot platform to take ownership of it.  The way you do this is by installing your own Platform Key.  Once you have done this, you can use key database maintenance tools like keytool to edit all the keys on the Platform and move the platform programmatically from Setup Mode to User Mode and back again.  This blog post describes how you go about doing this.

First Save the Variables

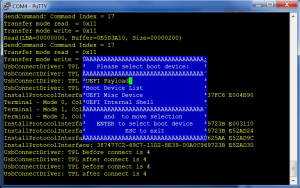
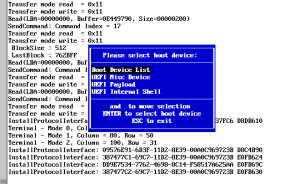
The first thing to do is to install and run KeyTool either directly (the platform must have secure boot turned off, because keytool is unsigned) or via the mini USB image and save all the current secure variable keys (select the ‘Save Keys’ option from the top level menu).  This will save the contents of each variable as a single esl (EFI Signature List) file, so you should end up with three files: PK.esl, KEK.esl and db.esl.  These files can later be used to restore the contents if something goes wrong in the updates (and because some platforms put you into setup mode by erasing the contents of all the secure variables), so save them in a safe place.

Use the UEFI Menus to remove the Platform Key

This is the step that it’s impossible to be precise about.  Every UEFI platform seems to be different in how you do this.  The Linux Foundation hosts a web page collecting the information but so far it only has the Intel Tunnel Mountain system on it, but if you work it out for your platform, leave me a comment describing what you did and I’ll add it to the LF page.

The most common way to get a UEFI system to display the UEFI menus is to press ESC as it boots up.

Create your own Platform Key

If you rpm installed efitools, it will automatically have created a Platform Key for you in /usr/share/efitools/keys, plus all of the PK.auth and noPK.auth files.

A platform key may be self signed, but doesn’t have to be (I’m using one signed with my root certificate). However, assuming you want to create a self-signed platform key manually, here are the steps: The standard command for doing this with openssl is

openssl req -new -x509 -newkey rsa:2048 -subj “/CN=<my CN text>/” -keyout PK.key -out PK.crt -days 3650 -nodes -sha256

None of the parameters for the key (Like the Common Name) matters, so you can replace <my CN text> with anything you like (mine says ‘James Bottomley Platform Key 2013’) you can also add other X509 well known objects like your address.  Once you have the two files PK.crt and PK.key, you need to save them in a safe location (PK.key is the one to guard since it’s your private key).

Next, create an EFI Signature List file with the public key in (this and the next steps require that you have either installed the efitools rpm or compiled the unix commands from efitools.git and installed them on your system)

cert-to-efi-sig-list -g <my random guid> PK.crt PK.esl

where <my random guid> is any random GUID you choose.  You also need to create an empty noPK.esl file which can be used to remove the platform key again

> noPK.esl

(do an ls -l on it to make sure it has zero size).

Now you create the signed update files (called .auth files)

sign-efi-sig-list -k PK.key -c PK.crt PK PK.esl PK.auth

sign-efi-sig-list -k PK.key -c PK.crt PK noPK.esl noPK.auth

copy the two .auth files to your USB key and you should now be able to use KeyTool to insert them into where the platform key is.  Go to ‘Edit Keys’, select the ‘The Platform Key (PK)’ and then ‘Replace Keys(s)’.  Navigate the file Chooser to your PK.auth file and you now are the platform Owner.  Press ESC to go to the top level menu and it should tell you the platform is in User Mode and Secure Boot is enabled.  Now verify you can move back to Setup Mode by going to ‘Edit Keys’, ‘The Platform Key (PK)’ and this time selecting the first entry (showing the GUID you chose for your platform key) and then ‘Delete with .auth file’.  This time navigate to noPK.auth and select it.  The platform key should now be gone and when you ESC to the top menu it will tell you you are in Setup Mode.  You now own your own platform and can move easily between setup and user modes.

Replace or Edit the rest of the Keys

Now you own your own platform, restoring or replacing the current platform keys is easy.  Where you saved the original keys, you should have a KEK.esl and a db.esl file.  If you find that KEK and db are blank, you can restore them with this file, simply place the platform into Setup Mode, go to ‘Edit Keys’, ‘The Key Exchange Key Database (KEK)’ and ‘Replace Key(s)’ and finally navigate to the KEK.esl file you saved.  You can also do the same thing with db.esl

Now your platform should be back to its original condition except that you own the Platform Key and can decide easily to flip it into Setup Mode.  Once in setup mode, you can edit the actual keys.  One thing you can do is create your own signature key (using the method above for PK) and place it into db.  You could also (assuming you never plan to boot windows) delete all the microsoft keys from the system.  Beware if you decide to do this that some of your UEFI drivers may be signed by microsoft keys, and removing them all may limit the functionality of your UEFI platform.  Additionally, any UEFI update to your system is also likely to come signed with the microsoft keys, however, in this case you can put the Microsoft keys back before doing the update.

If pieces of your UEFI system do need to be signed, it might be possible to extract them and sign them with your key instead of Microsoft’s, but I haven’t yet found a system that needs this, so I don’t really have much of an idea how to do it.

Remember to move your platform back to User Mode to enable secure boot before you exit KeyTool.

Linux Foundation Secure Boot System Released

As promised, here is the Linux Foundation UEFI secure boot system.  This was actually released to us by Microsoft on Wednesday 6 February, but with travel, conferences and meetings I didn’t really get time to validate it all until today.  The files are here

I’ve also put together a mini-USB image that is bootable (just dd it on to any USB key; the image is gpt partitioned, so use the whole disk device).  It has an EFI shell where the kernel should be and uses gummiboot to load.  You can find it here (md5sum 7971231d133e41dd667a184c255b599f).

To use the mini-USB image, you have to enroll the hashes for loader.efi (in the \EFI\BOOT directory; actually gummiboot) as well as shell.efi (in the top level directory).  It also includes a copy of KeyTool.efi which you have to enrol the hash of to run as well.

What Happened to KeyTool.efi?

Originally this was going to be part of our signed release kit.  However, during testing Microsoft discovered that because of a bug in one of the UEFI platforms, it could be used to remove the platform key programmatically, which would rather subvert the UEFI security system.  Until we can resolve this (we’ve now got the particular vendor in the loop), they declined to sign KeyTool.efi although you can, of course, authorize it by hash in the MOK variables if you want to run it.

Let me know how this goes because I’m very interested to gather feedback about what works and what doesn’t work.  In particular, there’s a worry that the security protocol override might not work on some platforms, so I particularly want to know if it doesn’t work for you.

LCA2013 and Rearchitecting Secure Boot

I’ve been quiet for a while, so it’s time to give an update about what’s happening with the Linux Foundation secure boot loader (Especially as this has recently been presented at LCA2013 [slides]).

The gist of the problem is that GregKH discovered in early December that the proposed Pre-BootLoader wouldn’t work in its current form with Gummiboot.  This was a bit disheartening because it meant that it didn’t fulfill the Linux Foundation mission of enabling all bootloaders.  On investigation, the reason was simple: Gummiboot was created to demonstrate you could make a small and simple bootloader that takes advantage of all the services available in the UEFI platform instead of being the massive link loader that things like grub are.  Unfortunately this means that it boots kernels using BootServices->LoadImage(), which means that the kernel to be booted is run through the UEFI platform secure boot checks.  Originally Pre-BootLoader, like shim, was written to use PE/Coff link loading to defeat the secure boot checks.  Unfortunately, this means that something run by the Pre-BootLoader must also use link loading to defeat the secure boot checks on anything it wants to load and thus, Gummiboot, which is deliberately not a link loader, won’t work under this scheme.

So time for a re-architecture and a re-write:  The problem has now gone from being how do we create a Microsoft signed link loader that obeys their policies to how do we enable all children of the bootloader to use BootServices->LoadImage() in a way that obeys their policies.  Fortunately, there is a way to intercept the UEFI platform signing infrastructure by installing your own security architecture protocol (See the Platform Initialization spec Volume 2 section 12.9).  Unfortunately, the PI Spec isn’t actually part of the UEFI specification, but fortunately it is implemented by every Windows 8 system that I can find.  The new architecture now Intercepts this protocol and adds its own security check.  However, there’s a second problem: While we’re in the security architecture protocol callback, we don’t necessarily own the screen of the UEFI system, making it completely impossible to do a present user test for authorising the running of the bnary.  Fortunately, there does exist a non interactive way of doing this and that’s the SUSE MOK mechanism.  Thus, the Linux Foundation Pre-BootLoader has now evolved to use the standard MOK variables to store hashes of authorized binaries.

The upshot of all of this is you can now use Pre-BootLoader with Gummiboot (as demoed at LCA2013).  To boot, you have to add two hashes: one for Gummiboot itself and one for the kernel you’re booting, but actually this is a good thing because now you have a single security policy controlling all of your boot sequence.  Gummiboot itself has also been patched to recognise a failure due to secure boot and pop up a helpful message telling you which hash to enrol.

I’ll be doing a separate post explaining how the new architecture works (or you can read the slides), but I thought I’d better explain what’s been going on for the last month.