Category Archives: Containers

Blog posts related to container technology for shared Operating System Virtualization

Measuring the Horizontal Attack Profile of Nabla Containers

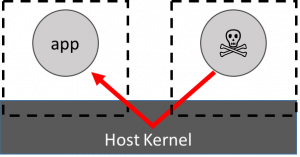
One of the biggest problems with the current debate about Container vs Hypervisor security is that no-one has actually developed a way of measuring security, so the debate is all in qualitative terms (hypervisors “feel” more secure than containers because of the interface breadth) but no-one actually has done a quantitative comparison.  The purpose of this blog post is to move the debate forwards by suggesting a quantitative methodology for measuring the Horizontal Attack Profile (HAP).  For more details about Attack Profiles, see this blog post.  I don’t expect this will be the final word in the debate, but by describing how we did it I hope others can develop quantitative measurements as well.

Well begin by looking at the Nabla technology through the relatively uncontroversial metric of performance.  In most security debates, it’s acceptable that some performance is lost by securing the application.  As a rule of thumb, placing an application in a hypervisor loses anywhere between 10-30% of the native performance.  Our goal here is to show that, for a variety of web tasks, the Nabla containers mechanism has an acceptable performance penalty.

Performance Measurements

We took some standard benchmarks: redis-bench-set, redis-bench-get, python-tornado and node-express and in the latter two we loaded up the web servers with simple external transactional clients.  We then performed the same test for docker, gVisor, Kata Containers (as our benchmark for hypervisor containment) and nabla.  In all the figures, higher is better (meaning more throughput):

The red Docker measure is included to show the benchmark.  As expected, the Kata Containers measure is around 10-30% down on the docker one in each case because of the hypervisor penalty.  However, in each case the Nabla performance is the same or higher than the Kata one, showing we pay less performance overhead for our security.  A final note is that since the benchmarks are network ones, there’s somewhat of a penalty paid by userspace networking stacks (which nabla necessarily has) for plugging into docker network, so we show two values, one for the bridging plug in (nabla-containers) required to orchestrate nabla with kubernetes and one as a direct connection (nabla-raw) showing where the performance would be without the network penalty.

One final note is that, as expected, gVisor sucks because ptrace is a really inefficient way of connecting the syscalls to the sandbox.  However, it is more surprising that gVisor-kvm (where the sandbox connects to the system calls of the container using hypercalls instead) is also pretty lacking in performance.  I speculate this is likely because hypercalls exact their own penalty and hypervisors usually try to minimise them, which using them to replace system calls really doesn’t do.

HAP Measurement Methodology

The Quantitative approach to measuring the Horizontal Attack Profile (HAP) says that we take the bug density of the Linux Kernel code  and multiply it by the amount of unique code traversed by the running system after it has reached a steady state (meaning that it doesn’t appear to be traversing any new kernel paths). For the sake of this method, we assume the bug density to be uniform and thus the HAP is approximated by the amount of code traversed in the steady state.  Measuring this for a running system is another matter entirely, but, fortunately, the kernel has a mechanism called ftrace which can be used to provide a trace of all of the functions called by a given userspace process and thus gives a reasonable approximation of the number of lines of code traversed (note this is an approximation because we measure the total number of lines in the function taking no account of internal code flow, primarily because ftrace doesn’t give that much detail).  Additionally, this methodology works very well for containers where all of the control flow emanates from a well known group of processes via the system call information, but it works less well for hypervisors where, in addition to the direct hypercall interface, you also have to add traces from the back end daemons (like the kvm vhost kernel threads or dom0 in the case of Xen).

HAP Results

The results are for the same set of tests as the performance ones except that this time we measure the amount of code traversed in the host kernel:

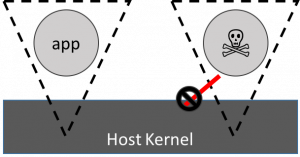
As stated in our methodology, the height of the bar should be directly proportional to the HAP where lower is obviously better.  On these results we can say that in all cases the Nabla runtime tender actually has a better HAP than the hypervisor contained Kata technology, meaning that we’ve achieved a container system with better HAP (i.e. more secure) than hypervisors.

Some of the other results in this set also bear discussing.  For instance the Docker result certainly isn’t 10x the Kata result as a naive analysis would suggest.  In fact, the containment provided by docker looks to be only marginally worse than that provided by the hypervisor.  Given all the hoopla about hypervisors being much more secure than containers this result looks surprising but you have to consider what’s going on: what we’re measuring in the docker case is the system call penetration of normal execution of the systems.  Clearly anything malicious could explode this result by exercising all sorts of system calls that the application doesn’t normally use.  However, this does show clearly that a docker container with a well crafted seccomp profile (which blocks unexpected system calls) provides roughly equivalent security to a hypervisor.

The other surprising result is that, in spite of their claims to reduce the exposure to Linux System Calls, gVisor actually is either equivalent to the docker use case or, for the python tornado test, significantly worse than the docker case.  This too is explicable in terms of what’s going on under the covers: gVisor tries to improve containment by rewriting the Linux system call interface in Go.  However, no-one has paid any attention to the amount of system calls the Go runtime is actually using, which is what these results are really showing.  Thus, while current gVisor doesn’t currently achieve any containment improvement on this methodology, it’s not impossible to write a future version of the Go runtime that is much less profligate in the way it uses system calls by developing a Secure Go using the same methodology we used to develop Nabla.

Conclusions

On both tests, Nabla is far and away the best containment technology for secure workloads given that it sacrifices the least performance over docker to achieve the containment and, on the published results, is 2x more secure even than using hypervisor based containment.

Hopefully these results show that it is perfectly possible to have containers that are more secure than hypervisors and lays to rest, finally, the arguments about which is the more secure technology.  The next step, of course, is establishing the full extent of exposure to a malicious application and to do that, some type of fuzz testing needs to be employed.  Unfortunately, right at the moment, gVisor is simply crashing when subjected to fuzz testing, so it needs to become more robust before realistic measurements can be taken.

A New Method of Containment: IBM Nabla Containers

In the previous post about Containers and Cloud Security, I noted that most of the tenants of a Cloud Service Provider (CSP) could safely not worry about the Horizontal Attack Profile (HAP) and leave the CSP to manage the risk.  However, there is a small category of jobs (mostly in the financial and allied industries) where the damage done by a Horizontal Breach of the container cannot be adequately compensated by contractual remedies.  For these cases, a team at IBM research has been looking at ways of reducing the HAP with a view to making containers more secure than hypervisors.  For the impatient, the full open source release of the Nabla Containers technology is here and here, but for the more patient, let me explain what we did and why.  We’ll have a follow on post about the measurement methodology for the HAP and how we proved better containment than even hypervisor solutions.

The essence of the quest is a sandbox that emulates the interface between the runtime and the kernel (usually dubbed the syscall interface) with as little code as possible and a very narrow interface into the kernel itself.

The Basics: Looking for Better Containment

The HAP attack worry with standard containers is shown on the left: that a malicious application can breach the containment wall and attack an innocent application.  This attack is thought to be facilitated by the breadth of the syscall interface in standard containers so the guiding star in developing Nabla Containers was a methodology for measuring the reduction in the HAP (and hence the improvement in containment), but the initial impetus came from the observation that unikernel systems are nicely modular in the libOS approach, can be used to emulate systemcalls and, thanks to rumprun, have a wide set of support for modern web friendly languages (like python, node.js and go) with a fairly thin glue layer.  Additionally they have a fairly narrow set of hypercalls that are actually used in practice (meaning they can be made more secure than conventional hypervisors).  Code coverage measurements of standard unikernel based kvm images confirmed that they did indeed use a far narrower interface.

Replacing the Hypervisor Interface

One of the main elements of the hypervisor interface is the transition from a less privileged guest kernel to a more privileged host one via hypercalls and vmexits.  These CPU mediated events are actually quite expensive, certainly a lot more expensive than a simple system call, which merely involves changing address space and privilege level.  It turns out that the unikernel based kvm interface is really only nine hypercalls, all of which are capable of being rewritten as syscalls, so the approach to running this new sandbox as a container is to do this rewrite and seccomp restrict the interface to being only what the rewritten unikernel runtime actually needs (meaning that the seccomp profile is now CSP enforced).  This vision, by the way, of a broad runtime above being mediated to a narrow interface is where the name Nabla comes from: The symbol for Nabla is an inverted triangle (∇) which is broad at the top and narrows to a point at the base.

Using this formulation means that the nabla runtime (or nabla tender) can be run as a single process within a standard container and the narrowness of the interface to the host kernel prevents most of the attacks that a malicious application would be able to perform.

DevOps and the ParaVirt conundrum

Back at the dawn of virtualization, there were arguments between Xen and VMware over whether a hypervisor should be fully virtual (capable of running any system supported by the virtual hardware description) or paravirtual (the system had to be modified to run on the virtualization system and thus would be incapable of running on physical hardware).  Today, thanks in a large part to CPU support for virtualization primtives, fully paravirtual systems have long since gone the way of the dodo and everyone nowadays expects any OS running on a hypervisor to be capable of running on physical hardware1.  The death of paravirt also left the industry with an aversion to ever reviving it, which explains why most sandbox containment systems (gVisor, Kata) try to require no modifications to the image.

With DevOps, the requirement is that images be immutable and that to change an image you must take it through the full develop build, test, deploy cycle.  This development centric view means that, provided there’s no impact to the images you use as the basis for your development, you can easily craft your final image to suit the deployment environment, which means a step like linking with the nabla tender is very easy.  Essentially, this comes down to whether you take the Dev (we can rebuild to suit the environment) or the Ops (the deployment environment needs to accept arbitrary images) view.  However, most solutions take the Ops view because of the anti-paravirt bias.  For the Nabla tender, we take the Dev view, which is born out by the performance figures.

Conclusion

Like most sandbox models, the Nabla containers approach is an alternative to namespacing for containment, but it still requires cgroups for resource management.  The figures show that the containment HAP is actually better than that achieved with a hypervisor and the performance, while being marginally less than a namespaced container, is greater than that obtained by running a container inside a hypervisor.  Thus we conclude that for tenants who have a real need for HAP reduction, this is a viable technology.

Containers and Cloud Security

Introduction

The idea behind this blog post is to take a new look at how cloud security is measured and what its impact is on the various actors in the cloud ecosystem.  From the measurement point of view, we look at the vertical stack: all code that is traversed to provide a service all the way from input web request to database update to output response potentially contains bugs; the bug density is variable for the different components but the more code you traverse the higher your chance of exposure to exploitable vulnerabilities.  We’ll call this the Vertical Attack Profile (VAP) of the stack.  However, even this axis is too narrow because the primary actors are the cloud tenant and the cloud service provider (CSP).  In an IaaS cloud, part of the vertical profile belongs to the tenant (The guest kernel, guest OS and application) and part (the hypervisor and host OS) belong to the CSP.  However, the CSP vertical has the additional problem that any exploit in this piece of the stack can be used to jump into either the host itself or any of the other tenant virtual machines running on the host.  We’ll call this exploit causing a failure of containment the Horizontal Attack Profile (HAP).  We should also note that any Horizontal Security failure is a potentially business destroying event for the CSP, so they care deeply about preventing them.  Conversely any exploit occurring in the VAP owned by the Tenant can be seen by the CSP as a tenant only problem and one which the Tenant is responsible for locating and fixing.  We correlate size of profile with attack risk, so the large the profile the greater the probability of being exploited.

From the Tenant point of view, improving security can be done in one of two ways, the first (and mostly aspirational) is to improve the security and monitoring of the part of the Vertical the Tenant is responsible for and the second is to shift responsibility to the CSP, so make the CSP responsible for more of the Vertical.  Additionally, for most Tenants, a Horizontal failure mostly just means they lose trust in the CSP, unless the Tenant is trusting the CSP with sensitive data which can be exfiltrated by the Horizontal exploit.  In this latter case, the Tenant still cannot do anything to protect the CSP part of the Security Profile, so it’s mostly a contractual problem: SLAs and penalties for SLA failures.

Examples

To see how these interpretations apply to the various cloud environments, lets look at some of the Cloud (and pre-Cloud) models:

Physical Infrastructure

The left hand diagram shows a standard IaaS rented physical system.  Since the Tenant rents the hardware it is shown as red indicating CSP ownership and the the two Tenants are shown in green and yellow.  In this model, barring attacks from the actual hardware, the Tenant owns the entirety of the VAP.  The nice thing for the CSP is that hardware provides air gap security, so there is no HAP which means it is incredibly secure.

However, there is another (much older) model shown on the right, called the shared login model,  where the Tenant only rents a login on the physical system.  In this model, only the application belongs to the Tenant, so the CSP is responsible for much of the VAP (the expanded red area).  Here the total VAP is the same, but the Tenant’s VAP is much smaller: the CSP is responsible for maintaining and securing everything apart from the application.  From the Tenant point of view this is a much more secure system since they’re responsible for much less of the security.  From the CSP point of view there is now a  because a tenant compromising the kernel can control the entire system and jump to other tenant processes.  This actually has the worst HAP of all the systems considered in this blog.

Hypervisor based Virtual Infrastructure

In this model, the total VAP is unquestionably larger (worse) than the physical system above because there’s simply more code to traverse (a guest and a host kernel).  However, from the Tenant’s point of view, the VAP should be identical to that of unshared physical hardware because the CSP owns all the additional parts.  However, there is the possibility that the Tenant may be compromised by vulnerabilities in the Virtual Hardware Emulation.  This can be a worry because an exploit here doesn’t lead to a Horizontal security problem, so the CSP is apt to pay less attention to vulnerabilities in the Virtual Hardware simply because each guest has its own copy (even though that copy is wholly under the control of the CSP).

The HAP is definitely larger (worse) than the physical host because of the shared code in the Host Kernel/Hypervisor, but it has often been argued that because this is so deep in the Vertical stack that the chances of exploit are practically zero (although venom gave the lie to this hope: stack depth represents obscurity, not security).

However, there is another way of improving the VAP and that’s to reduce the number of vulnerabilities that can be hit.  One way that this can be done is to reduce the bug density (the argument for rewriting code in safer languages) but another is to restrict the amount of code which can be traversed by narrowing the interface (for example, see arguments in this hotcloud paper).  On this latter argument, the host kernel or hypervisor does have a much lower VAP than the guest kernel because the hypercall interface used for emulating the virtual hardware is very narrow (much narrower than the syscall interface).

The important takeaways here are firstly that simply transferring ownership of elements in the VAP doesn’t necessarily improve the Tenant VAP unless you have some assurance that the CSP is actively monitoring and fixing them.  Conversely, when the threat is great enough (Horizontal Exploit), you can trust to the natural preservation instincts of the CSP to ensure correct monitoring and remediation because a successful Horizontal attack can be a business destroying event for the CSP.

Container Based Virtual Infrastructure

The total VAP here is identical to that of physical infrastructure.  However, the Tenant component is much smaller (the kernel accounting for around 50% of all vulnerabilities).  It is this reduction in the Tenant VAP that makes containers so appealing: the CSP is now responsible for monitoring and remediating about half of the physical system VAP which is a great improvement for the Tenant.  Plus when the CSP remediates on the host, every container benefits at once, which is much better than having to crack open every virtual machine image to do it.  Best of all, the Tenant images don’t have to be modified to benefit from these fixes, simply running on an updated CSP host is enough.  However, the cost for this is that the HAP is the entire linux kernel syscall interface meaning the HAP is much larger than then hypervisor virtual infrastructure case because the latter benefits from interface narrowing to only the hypercalls (qualitatively, assuming the hypercall interface is ~30 calls and the syscall interface is ~300 calls, then the HAP is 10x larger in the container case than the hypervisor case); however, thanks to protections from the kernel namespace code, the HAP is less than the shared login server case.  Best of all, from the Tenant point of view, this entire HAP cost is borne by the CSP, which makes this an incredible deal: not only does the Tenant get a significant reduction in their VAP but the CSP is hugely motivated to keep on top of all vulnerabilities in their part of the VAP and remediate very fast because of the business implications of a successful horizontal attack.  The flip side of this is that a large number of the world’s CSPs are very unhappy about this potential risks and costs and actually try to shift responsibility (and risk) back to the Tenant by advocating nested virtualization solutions like running containers in hypervisors. So remember, you’re only benefiting from the CSP motivation to actively maintain their share of the VAP if your CSP runs bare metal containers because otherwise they’ve quietly palmed the problem back off on you.

Other Avenues for Controlling Attack Profiles

The assumption above was that defect density per component is roughly constant, so effectively the more code the more defects.  However, it is definitely true that different code bases have different defect densities, so one way of minimizing your VAP is to choose the code you rely on carefully and, of course, follow bug reduction techniques in the code you write.

Density Reduction

The simplest way of reducing defects is to find and fix the ones in the existing code base (while additionally being careful about introducing new ones).  This means it is important to know how actively defects are being searched for and how quickly they are being remediated.  In general, the greater the user base for the component, the greater the size of the defect searchers and the faster the speed of their remediation, which means that although the Linux Kernel is a big component in the VAP and HAP, a diligent patch routine is a reasonable line of defence because a fixed bug is not an exploitable bug.

Another way of reducing defect density is to write (or rewrite) the component in a language which is less prone to exploitable defects.  While this approach has many advocates, particularly among language partisans, it suffers from the defect decay issue: the idea that the maximum number of defects occurs in freshly minted code and the number goes down over time because the more time from release the more chance they’ve been found.  This means that a newly rewritten component, even in a shiny bug reducing language, can still contain more bugs than an older component written in a more exploitable language, simply because a significant number of bugs introduced on creation have been found in the latter.

Code Reduction (Minimization Techniques)

It also stands to reason that, for a complex component, simply reducing the amount of code that is accessible to the upper components reduces the VAP because it directly reduces the number of defects.  However, reducing the amount of code isn’t as simple as it sounds: it can only really be done by components that are configurable and then only if you’re not using the actual features you eliminate.  Elimination may be done in two ways, either physically, by actually removing the code from the component or virtually by blocking access using a guard (see below).

Guarding and Sandboxing

Guarding is mostly used to do virtual code elimination by blocking access to certain code paths that the upper layers do not use.  For instance, seccomp  in the Linux Kernel can be used to block access to system calls you know the application doesn’t use, meaning it also blocks any attempt to exploit code that would be in those system calls, thus reducing the VAP (and also reducing the HAP if the kernel is shared).

The deficiencies in the above are obvious: if the application needs to use a system call, you cannot block it although you can filter it, which leads to huge and ever more complex seccomp policies.  The solution for the system call an application has to use problem can sometimes be guarding emulation.  In this mode the guard code actually emulates all the effects of the system call without actually making the actual system call into the kernel.  This approach, often called sandboxing, is certainly effective at reducing the HAP since the guards usually run in their own address space which cannot be used to launch a horizontal attack.  However, the sandbox may or may not reduce the VAP depending on the bugs in the emulation code vs the bugs in the original.  One of the biggest potential disadvantages to watch out for with sandboxing is the fact that the address space the sandbox runs in is often that of the tenant, often meaning the CSP has quietly switched ownership of that component back to the tenant as well.

Conclusions

First and foremost: security is hard.  As a cloud Tenant, you really want to offload as much of it as possible to people who are much more motivated to actually do it than you are (i.e. the Cloud Service Provider).

The complete Vertical Attack Profile of a container bare metal system in the cloud is identical to a physical system and better than a Hypervisor based system; plus the tenant owned portion is roughly 50% of the total VAP meaning that Containers are by far the most secure virtualization technology available today from the Tenant perspective.

The increased Horizontal Attack profile that containers bring should all rightly belong to the Cloud Service Provider.  However, CSPs are apt to shirk this responsibility and try to find creative ways to shift responsibility back to the tenant including spreading misinformation about the container Attack profiles to try to make Tenants demand nested solutions.

Before you, as a Tenant, start worrying about the CSP owned Horizontal Attack Profile, make sure that contractual remedies (like SLAs or Reputational damage to the CSP) would be insufficient to cover the consequences of any data loss that might result from a containment breach.  Also remember that unless you, as the tenant, are under external compliance obligations like HIPPA or PCI, contractual remedies for a containment failure are likely sufficient and you should keep responsibility for the HAP where it belongs: with the CSP.

Unprivileged Build Containers

A while ago, a goal I set myself was to be able to maintain my build and test environments for architecture emulation containers without having to do any of the tasks as root and without creating any suid binaries to do this.  One of the big problems here is that distributions get annoyed (and don’t run correctly) if root doesn’t own most of the files … for instance the installers all check to see that the file got installed with the correct ownership and permissions and fail if they don’t.  Debian has an interesting mechanism, called fakeroot, to get around this using a preload library intercepting the chmod and chown system calls, but it’s getting a bit hackish to try to extend this to work permanently for an emulation container.

The correct way to do this is with user namespaces so the rest of this post will show you how.  Before we get into how to use them, lets begin with the theory of how user namespaces actually work.

Theory of User Namespaces

A user namespace is the single namespace that can be created by an unprivileged user.  Their job is to map a set of interior (inside the user namespace) uids, gids and projids1 to a set of exterior (outside the user namespace).

The way this works is that the root user namespace simply has a 1:1 identity mapping of all 2^32 identifiers, meaning it fully covers the space.  However, any new user namespace only need remap a subset of these.  Any id that is not mapped into the user namespace becomes inaccessible to that namespace.  This doesn’t mean completely inaccessible, it just means any resource owned or accessed by an unmapped id treats an attempted access (even from root in the namespace) as though it were completely unprivileged, so if the resource is readable by any id, it can still be read even in a user namespace where its owning id is unmapped.

User namespaces can also be nested but the nested namespace can only map ids that exist in its parent, so you can only reduce but not expand the id space by nesting.  The way the nested mapping works is that it remaps through all the parent namespaces, so what appears on the resource is still the original exterior ids.

User Namespaces also come with an owner (the uid/gid of the process that created the container).  The reason for this is that this owner is allowed to execute setuid/setgid to any id mapped into the namespace, so the owning uid/gid pair is the effective “root” of the container.  Note that this setuid/setgid property works on entry to the namespace even if uid 0 is not mapped inside the namespace, but won’t survive once the first setuid/setgid is issued.

The final piece of the puzzle is that every other namespace also has an owning user namespace, so while I cannot create a mount namespace as unprivileged user jejb, I can as remapped root inside my user namespace

jejb@jarvis:~> unshare --mount
unshare: unshare failed: Operation not permitted
jejb@jarvis:~> nsenter --user=/tmp/userns
root@jarvis:~# unshare --mount
root@jarvis:~#

And once created, I can always enter this mount namespace provided I’m also in my user namespace.

Setting up Unprivileged Namespaces

Any system user can actually create a user namespace.  However a non-root (meaning not uid zero in the parent namespace) user cannot remap any exterior id except their own.  This means that, because a build container needs a range of ids, it’s not possible to set up the intial remapped namespace without the help of root.  However, once that is done, the user can pretty much do every other operation2

The way remap ranges are set up is via the uid_map, gid_map and projid_map files sitting inside the /proc/<pid> directory.  These files may only be written to once and never updated3

As an example, to set up a build container, I need a remapping for every id that would be created during installation.  Traditionally for Linux, these are ids 0-999.  I want to remap them down to something unprivileged, say 100,000 so my line entry for this is

0 100000 1000

However, I also want an identity mapping for my own id (currently I’m at uid 1000), so I can still use my home directory from within the build container.  This also means I can create the roots for the containers within my home directory.  Finally, the nobody user and nobody,nogroup groups also need to be mapped, so the final uid map entries look like

0 100000 1000
1000 1000 1
65534 101001 1

For the groups, it’s even more complex because on openSUSE, I’m a member of the users group (gid 100) which sits in the middle of the privileged 0-999 group range, so the gid_map entry I use is

0 100000 100
100 100 1
101 100100 899
65533 101000 2

Which is almost up to the kernel imposed limit of five separate lines.

Finally, here’s how to set this up and create a binding for the user namespace.  As myself (I’m uid 1000 user name jejb) I do

jejb@jarvis:~> unshare --user
nobody@jarvis:~> echo $$
20211
nobody@jarvis:~>

Note that I become nobody inside the container because currently the map files are unwritten so there are no mapped ids at all.  Now as root, I have to write the mapping files and bind the entry file to the namespace somewhere

jarvis:/home/jejb # echo 1|awk '{print "0 100000 1000\n1000 1000 1\n65534 101001 1"}' > /proc/20211/uid_map
jarvis:/home/jejb # echo 1|awk '{print "0 100000 100\n100 100 1\n101 100100 899\n65533 101000 2"}' > /proc/20211/gid_map
jarvis:/home/jejb # touch /tmp/userns
jarvis:/home/jejb # mount --bind /proc/20211/ns/user /tmp/userns

Now I can exit my user namespace because it’s permanently bound and the next time I enter it I become root inside the container (although with uid 100000 outside)

jejb@jarvis:~> nsenter --user=/tmp/userns
root@jarvis:~# id
uid=0(root) gid=0(root) groups=0(root)
root@jarvis:~# su - jejb
jejb@jarvis:~> id
uid=1000(jejb) gid=100(users) groups=100(users)

Giving me a user namespace with sufficient mapped ids to create a build container.

Unprivileged Architecture Emulation Containers

Essentially, I can use the user namespace constructed above to bootstrap and enter the entire build container and its mount namespace with one proviso that I have to have a pre-created devices directory because I don’t possess the mknod capability as myself, so my container root also doesn’t possess it.  The way I get around this is to create the initial dev directory as root and then change the ownership to 100000.100000 (my unprivileged ids)

jejb@jarvis:~/containers/debian-amd64/dev> ls -l
total 0
lrwxrwxrwx 1 100000 100000 13 Feb 20 09:45 fd -> /proc/self/fd/
crw-rw-rw- 1 100000 100000 1, 7 Feb 20 09:45 full
crw-rw-rw- 1 100000 100000 1, 3 Feb 20 09:45 null
lrwxrwxrwx 1 100000 100000 8 Feb 20 09:45 ptmx -> pts/ptmx
drwxr-xr-x 2 100000 100000 6 Feb 20 09:45 pts/
crw-rw-rw- 1 100000 100000 1, 8 Feb 20 09:45 random
drwxr-xr-x 2 100000 100000 6 Feb 20 09:45 shm/
lrwxrwxrwx 1 100000 100000 15 Feb 20 09:45 stderr -> /proc/self/fd/2
lrwxrwxrwx 1 100000 100000 15 Feb 20 09:45 stdin -> /proc/self/fd/0
lrwxrwxrwx 1 100000 100000 15 Feb 20 09:45 stdout -> /proc/self/fd/1
crw-rw-rw- 1 100000 100000 5, 0 Feb 20 09:45 tty
crw-rw-rw- 1 100000 100000 1, 9 Feb 20 09:45 urandom
crw-rw-rw- 1 100000 100000 1, 5 Feb 20 09:45 zero

This seems to be sufficient of a dev skeleton to function with.  For completeness sake, I placed my bound user namespace into /run/build-container/userns and following the original architecture container emulation post, with modified susebootstrap and build-container scripts.  The net result is that as myself I can now enter and administer and update the build and test architecture emulation container with no suid required

jejb@jarvis:~> nsenter --user=/run/build-container/userns --mount=/run/build-container/ppc64
root@jarvis:/# id
uid=0(root) gid=0(root) groups=0(root)
root@jarvis:/# uname -m
ppc64
root@jarvis:/# su - jejb
jejb@jarvis:~> id
uid=1000(jejb) gid=100(users) groups=100(users)

The only final wrinkle is that root has to set up the user namespace on every boot, but that’s only because there’s no currently defined operating system way of doing this.

Constructing Architecture Emulation Containers

Usually container related stuff goes on $EMPLOYER blog, but this time, I had a container need for my hobbies. the problem: how to build and test efitools for arm and aarch64 while not possessing any physical hardware.  The solution is to build an architecture emulation container using qemu and mount namespaces such that when its entered you find yourself in your home directory but with the rest of Linux running natively (well emulated natively via qemu) as a new architecture.  Binary emulation in Linux is nothing new: the binfmt_misc kernel module does it, and can execute anything provided you’ve told it what header to expect and how to do the execution.  Most distributions come with a qemu-linux-user package which will usually install the necessary binary emulators via qemu to run non-native binaries.  However, there’s a problem here: the installed binary emulator usually runs as /usr/bin/qemu-${arch}, so if you’re running a full operating system container, you can’t install any package that would overwrite that.  Unfortunately for me, the openSUSE Build Service package osc requires qemu-linux-user and would cause the overwrite of the emulator and the failure of the container.  The solution to this was to bind mount the required emulator into the / directory, where it wouldn’t be overwritten and to adjust the binfmt_misc paths accordingly.

Aside about binfmt_misc

The documentation for this only properly seems to exist in the kernel Documentation directory as binfmt_misc.txt.  However, very roughly, the format is

:name:type:offset:magic:mask:interpreter:flags

name is just a handle which will appear in /proc/sys/fs/binfmt_misc, type is M for magic or E for extension (Magic means recognise the type by the binary header, the usual UNIX way and E means recognise the type by the file extension, the Windows way). offset is where in the file to find the magic header to recognise;  magic and mask are the mask to and the binary string with and the magic to find once the masking is done.  Interpreter is the name of the interpreter to execute and flags tells binfmt_misc how to execute the interpreter.  For qemu, the flags always need to be OC meaning open the binary and generate credentials based on it (this can be seen as a security problem because the interpreter will execute with the same user and permissions as the binary, so you have to trust it).

If you’re on a systemd system, you can put all the above into /etc/binfmt.d/file.conf and systemd will feed it to binfmt_misc on boot.  Here’s an example of the aarch64 emulation file I use.

Bootstrapping

To bring up a minimal environment that’s fully native, you need to bootstrap it by installing just enough binaries using your native system before you can enter the container.  At a minimum, this is enough shared libraries and binaries to run the shell.  If you’re on a debian system, you probably already know how to use debootstrap to do this, but if you’re on openSUSE, like me, this is a much harder proposition because persuading zypper to install non native binaries isn’t easy.  The first thing you need to know is that you need to install an architectural override for libzypp in the file pointed to by the ZYPP_CONF environment variable. Here’s an example of a susebootstrap shell script that will install enough of the architecture to run zypper (so you can install all the packages you actually need).  Just run it as (note, you must have the qemu-<arch> binary installed because the installer will try to run pre and post scripts which may fail if they’re binary unless the emulation is working):

susebootstrap --arch <arch> <location>

And the bootstrap image will be build at <location> (I usually choose somewhere in my home directory, but you can use /var/tmp or anywhere else in your filesystem tree).  Note this script must be run as root because zypper can’t change ownership of files otherwise.  Now you are ready to start the architecture emulation container with <location> as the root.

Building an Architecture Emulation Container

All you really need now is a mount namespace with <location> as the real root and all the necessary Linux filesystems like /sys and /proc mounted.  Additionally, you usually want /home and I also mount /var/tmp so there’s a standard location for all my obs build directories.  Building a mount namespace is easy: simply unshare –mount and then bind mount everything you need.  Finally you use pivot_root to swap the new and old roots and unmount -l the old root (-l is necessary because the mount point is in-use outside the mount namespace as your real root, so you just need it unbinding, you don’t need to wait until no-one is using it).

All of this is easily scripted and I created this script to perform these actions.  As a final act, the script binds the process and creates an entry link in /run/build-container/<arch>.  This is the command line I used for the example below:

build-container --arch arm --location /home/jejb/tmp/arm

Now entering the build container is easy (you still have to enter the namespace as root, but you can exec su – <user> to become whatever your non-root user is).

jejb@jarvis:~> sudo -s
jarvis:/home/jejb # uname -m
x86_64
jarvis:/home/jejb # nsenter --mount=/run/build-container/arm
jarvis:/ # uname -m
armv7l
jarvis:/ # exec su - jejb
jejb@jarvis:~> uname -m
armv7l
jejb@jarvis:~> pwd
/home/jejb

And there you are, all ready to build binaries and run them on an armv7 system.

Aside about systemd and Shared Subtrees

On a normal linux system, you wouldn’t need to worry about any of this, but if you’re running systemd, you do, because systemd has some very inimical properties (to mount namespaces) you need to be aware of.

In Linux, a bind mount creates a subtree.  Because you can bind mount from practically anywhere to anywhere, you can have many such subtrees that are substantially related.  The default way to create subtrees is “private” this means that even if the subtrees are effectively the same set of files, a mount operation on one isn’t seen by any of the others.  This is great, because it’s precisely what you want for containers.  However, if a subtree is set to shared (with the mount –make-shared command) then all mount and unmount operations a propagated to every shared copy.  The reason this matters for systemd is because systemd at start of day sets every mount point in the system to shared.  Unless you re-privatise the bind mounts as you create the architecture emulation container, you’ll notice some very weird effects.  Firstly, because pivot_root won’t pivot to a shared subtree, that call will fail but secondly, you’ll notice that when you umount -l /old-root it will propagate to the real root and unmount everything (like your root /proc /dev and /sys) effectively rendering your system unusable.  the mount –make-rprivate /old-root recursively descends the /old-root and sets all the mounts to private so the umount -l simply detached the /old-root instead of propagating all the umount events.